

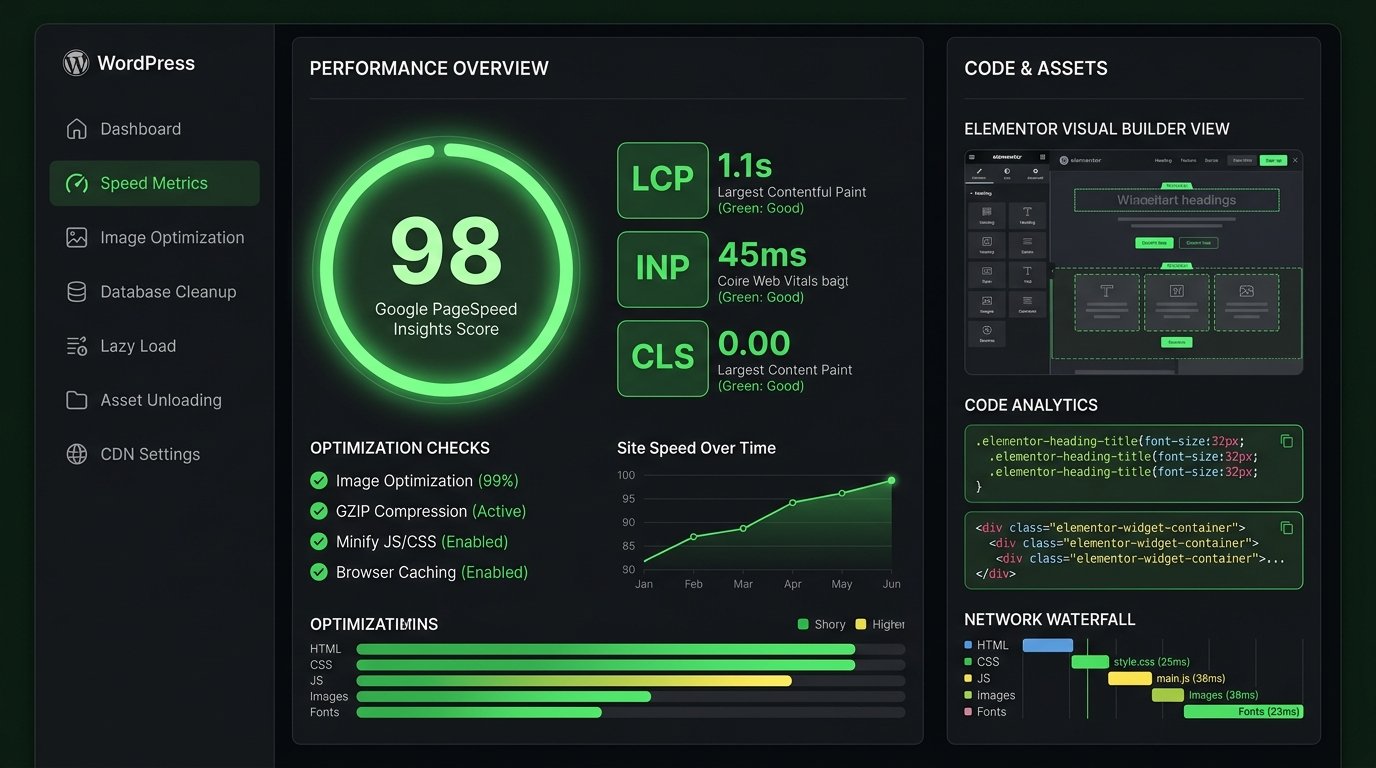
The Golden Rule of Elementor Performance Engineering
Yes, you can significantly improve Elementor performance without destroying the design—but the safest approach is to diagnose first, optimize one layer at a time, and test after every single change. Real-world PageSpeed scores vary across hosting environments, network latency, mobile CPU constraints, third-party tracking scripts, and dynamic plugin dependencies. Do not chase an arbitrary green number at the expense of functional checkout flows, responsive menus, or brand typography.
Elementor is the world's most widely adopted visual page builder for WordPress, powering tens of millions of corporate portals, freelance portfolios, and high-revenue WooCommerce stores. Yet, mention Elementor in web performance circles, and the consensus is often harsh: "It's too bloated. It creates DOM soup. It scores 35 on mobile Lighthouse."
The truth is more nuanced. Elementor provides unparalleled design velocity and marketing agility. However, when visual freedom is applied without engineering discipline, websites accumulate structural friction: uncompressed 4K hero background images, twelve nested containers for a simple icon box, five separate Google Font weights loaded asynchronously, dozens of inactive widget CSS stylesheets enqueued on every page load, and aggressive optimization plugins that strip critical JavaScript until mobile menus and WooCommerce add-to-cart buttons stop functioning completely.
This elementor speed optimization guide delivers a battle-tested, senior-level diagnostic protocol. You will learn how to reach 95+ PageSpeed scores and pass Google Core Web Vitals (Largest Contentful Paint < 2.5s, Interaction to Next Paint < 200ms, Cumulative Layout Shift < 0.1) while preserving 100% of your visual design, responsive layouts, client branding, and interactive functionality.
How to Optimize Elementor Safely in 8 Steps
- 1 Measure Baseline: Record mobile and desktop field/lab metrics via Google PageSpeed Insights and Chrome DevTools.
- 2 Identify Bottleneck: Trace the primary constraint (Server TTFB, LCP media weight, bloated DOM, or blocking JavaScript).
- 3 Optimize One Layer: Implement changes to a single layer (e.g. hero image preloading or container migration) on a staging copy.
- 4 Test Desktop Layout: Audit viewport alignment, sticky headers, animations, and typography rendering.
- 5 Test Mobile Responsiveness: Test at 375px and 412px viewports for horizontal overflow, font scale, and touch targets.
- 6 Test Core Functionality: Submit contact forms, trigger mobile hamburger menus, test popups, and verify WooCommerce carts.
- 7 Re-Measure PageSpeed: Validate that the isolated optimization yielded measurable CWV latency reduction.
- 8 Keep Only Regression-Free Changes: Commit working optimizations to production; immediately revert anything causing layout shifts.
1. Why Elementor Websites Become Slow: Visual vs Technical Complexity
To fix Elementor performance, you must first understand the crucial distinction between visual complexity and technical complexity.
A visually complex page with subtle gradients, dynamic typography, and card grids can load in under 800 milliseconds if engineered cleanly. Conversely, a visually minimalist page featuring just three text blocks, an image, and a newsletter form can score 40 on Lighthouse if it loads 1.8MB of unoptimized fonts, three external marketing pixels, and legacy section wrappers with 1,500 nested DOM nodes.
The Technical Elementor Pipeline: Where Latency Multiplies
When Elementor was released in 2016, modern CSS Flexbox and Grid support was incomplete across legacy mobile browsers. Elementor solved this by wrapping every column in multiple `div.elementor-column-wrap` and `div.elementor-widget-wrap` containers. On modern websites with nested layouts, this legacy architecture created massive document trees. Furthermore, third-party addon packs (such as Ultimate Addons, Essential Addons, or Crocoblock) frequently enqueue their entire 200KB script bundles globally across the entire site—even on pages where only a single simple button widget is used.
2. Start With a Performance Baseline: Diagnostic Instrumentation
Before modifying a single Elementor setting or installing a caching plugin, you must establish an unimpeachable diagnostic baseline. Without empirical measurement, optimization becomes blind guesswork, and you will have no way of knowing which specific adjustment delivered speed improvements or triggered visual regressions.
Largest Contentful Paint
Measures when the primary above-the-fold visual element (hero image, heading, or banner) finishes rendering.
Interaction to Next Paint
Replaced FID in March 2024. Measures UI responsiveness when users tap hamburger menus, buttons, or accordions.
Cumulative Layout Shift
Quantifies unexpected visual jumps caused by un-sized images, late-loading web fonts, or dynamic popups.
Time to First Byte
Server response latency. If your hosting takes 1.2s to serve the initial HTML document, reaching 95+ on mobile is impossible.
Google CrUX vs Synthetic Lighthouse
Lab data (Lighthouse) simulates a worst-case mobile device on a throttled connection. Field data (Chrome User Experience Report) tracks real-world visitors. Google search rankings are governed strictly by 28-day rolling Field Data.
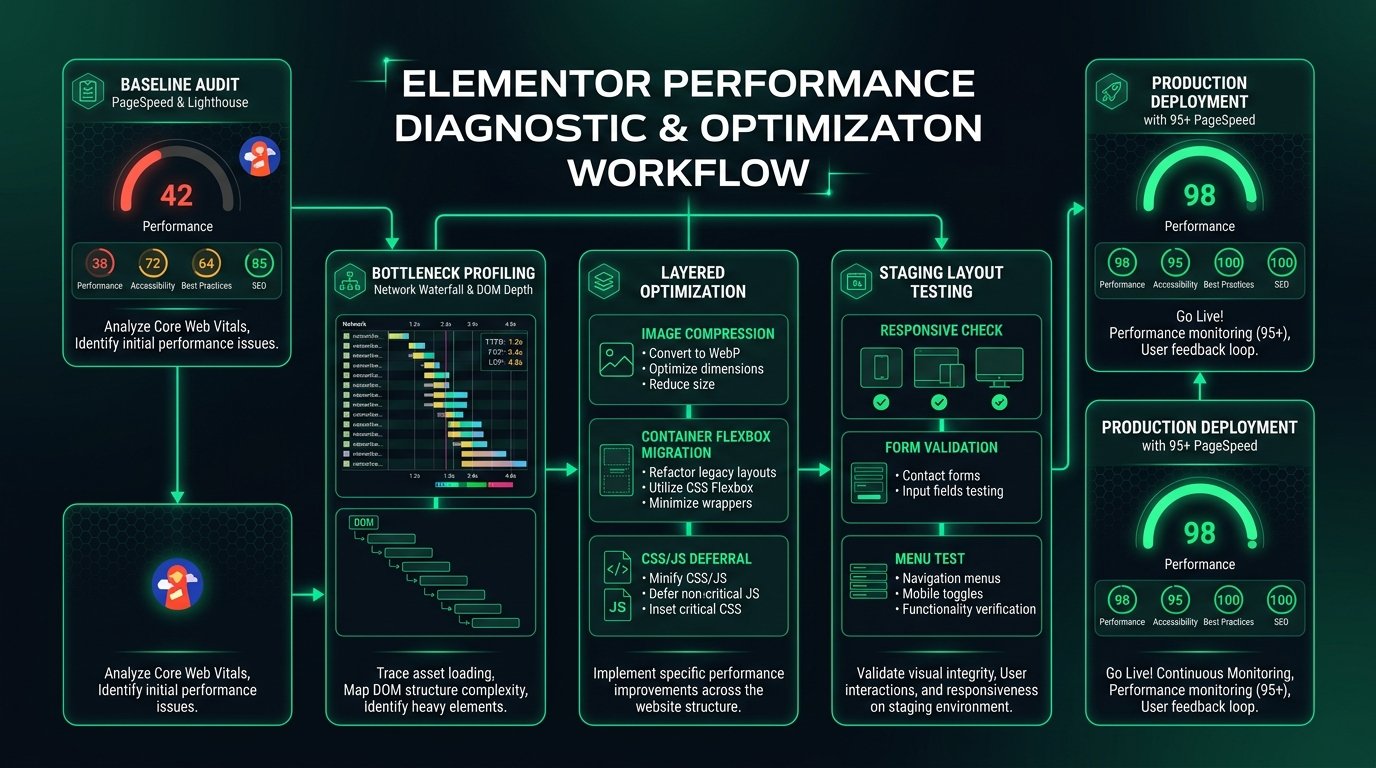
Always execute baseline audits using three complementary platforms:
- Google PageSpeed Insights: Identifies specific Core Web Vitals audit flags, render-blocking handles, and uncompressed payloads.
- WebPageTest (Custom Cable 4G Profile): Provides filmstrip views and waterflow timelines revealing exact millisecond-by-millisecond asset blocking.
- Chrome DevTools Performance Panel: Inspects CPU main-thread scripting, layout recalculations, and Long Tasks (>50ms) responsible for INP degradation.
3. Optimize Elementor Images Without Breaking the Visual Design
Media optimization is universally cited in every performance checklist, yet it remains the single most common cause of broken visual layouts on Elementor websites.
Common Pitfall: Blind Media Compression
Do not simply install an image compression plugin and set quality to 50%. Aggressive compression degrades brand typography on logos, pixelates detailed product photography, and ruins client trust. Real image optimization is a four-part engineering equation: Correct Dimensions + Modern Next-Gen Format + Lossless Compression + Intelligent Loading Strategy.
Follow these strict rules to optimize media safely:
- Resize Source Dimensions Prior to Upload: If an Elementor container on desktop is constrained to 400px width, never insert a 3,840px raw stock photo. Uploading a source image constrained to 800px (allowing 2x pixel density for high-DPI Retina screens) immediately reduces payload weight by up to 85% before compression even occurs.
- Enforce WebP and AVIF Formats: Serve next-generation WebP or AVIF formats. WebP delivers equivalent perceptual visual fidelity at a 30–40% smaller byte size compared to JPEG, while AVIF achieves up to 50% byte savings on complex photographs.
- Enforce Explicit Width and Height Attributes: Elementor widgets allow setting custom image sizes. Ensure that raw HTML `<img>` tags always output explicit `width` and `height` dimensions. This enables the browser engine to calculate the aspect ratio container box immediately, completely eliminating Cumulative Layout Shift (CLS) as images stream in.
- Never Lazy-Load the LCP Element: Native WordPress lazy-loading (`loading="lazy"`) and plugin lazy-loaders should be applied strictly to below-the-fold media. When an above-the-fold hero banner or featured image is lazy-loaded, the browser engine intentionally defers fetching until JavaScript computes its viewport position—adding 1.5 to 3.0 seconds of artificial delay to your Largest Contentful Paint.
4. Fix the Elementor Hero Section and LCP
On 90% of slow Elementor websites, the Largest Contentful Paint candidate is located directly inside the above-the-fold hero section. Hero sections frequently combine full-width background images, headline typography, sub-headings, dual call-to-action buttons, entry animations, and video backgrounds.
- • 2.4MB full-width PNG hero background image
- • Image loaded via external CSS `background-image`
- • Background video autoplaying on mobile
- • 3-slide Elementor carousel loading 3 large images at once
- • Complex fade-in-up entrance motion effects on heading
- • Lazy-load attribute mistakenly applied to hero image
- • 85KB responsive WebP image with srcset (desktop/mobile)
- • Direct semantic `<img>` with `fetchpriority="high"`
- • Preloaded via `<link rel="preload" as="image">` in head
- • Single static hero frame (carousels moved below fold)
- • CSS transitions replaced with hardware-accelerated transforms
- • Lazy-loading explicitly disabled for hero elements
Why does CSS `background-image` hurt LCP on Elementor? When an image is applied via CSS class (e.g. `.elementor-element-abc { background-image: url(...) }`), the browser's Preload Scanner cannot detect the image during initial HTML parsing. The browser must first download the HTML, download the CSS stylesheet, parse the CSS rules, match the selectors against the DOM tree, and only then dispatch the image network request.
By refactoring your hero to use a standard Elementor Image widget positioned with modern Flexbox or inserting a dedicated preload tag into `wp_head`, you allow the browser to initiate the image download concurrently with CSS parsing, slashing LCP by up to 2 seconds.
5. Reduce Elementor DOM Complexity: The Container Revolution
In Google Lighthouse, an audit titled "Avoid an excessive DOM size" triggers whenever a page exceeds 800 total DOM nodes, reaches a maximum tree depth greater than 32 elements, or includes a parent node with more than 60 child nodes.
Why does excessive DOM hurt Elementor websites? Each HTML node consumes memory in the browser engine. When responsive styles change on resize, or when scripts animate elements, the browser must execute Style Recalculation and Reflow across the entire subtree. On mobile devices with modest multi-core performance, large DOM trees lead to noticeable input lag, directly failing the Interaction to Next Paint (INP) Core Web Vital.
Legacy Sections vs Modern Flexbox Containers
                                <section class="elementor-section">

                                  <div class="elementor-container">

                                    <div class="elementor-column">

                                      <div class="elementor-widget-wrap">

                                        <div class="elementor-widget">

                                          <h2>Title</h2>
                                <div class="e-con e-con-boxed">

                                  <div class="e-con-inner">

                                    <h2 class="elementor-heading-title">Title</h2>

                                  </div>

                                </div>
By converting legacy Section/Column layouts to modern Flexbox Containers and CSS Grid Containers, you eliminate 50% to 70% of redundant wrapper elements. Modern Elementor builds featuring pure container architecture easily maintain total DOM counts well below 600 nodes, keeping mobile style recalculation latency under 15ms.
6. Use Elementor Performance Features Carefully
Elementor core contains multiple built-in performance optimization experiments under Elementor → Settings → Features. However, turning every experimental toggle on simultaneously on a live production website is a recipe for broken functionality.
Here is an expert evaluation of current Elementor performance modules:
- Optimized Control Loading: Safe & Highly Recommended. Reduces the volume of control configuration scripts loaded in the administrative editor and frontend runtime.
- Element Caching (Elementor 3.22+): Exceptional Impact. Caches the rendered HTML output of static widgets and containers, bypassing redundant PHP compilation and database lookups during subsequent visits.
- Optimized Image Loading: Recommended. Automatically injects priority hints (`fetchpriority="high"`) onto detected hero media and sets appropriate lazy-loading attributes on below-fold images.
- Lazy Load Background Images: Use with Discretion. Defers CSS background images. Warning: Ensure your above-the-fold hero background is explicitly excluded from this rule, otherwise your LCP will spike.
- Improved Asset Loading & Improved CSS Loading: Mandatory. Splits monolithic CSS files into discrete, component-based stylesheets, ensuring only the styles for active widgets on the current page are loaded.
- Flexbox Container & Grid Container: Mandatory Standard. Set to Active on all production installations.
7. Optimize Elementor CSS Without Breaking Layouts
CSS optimization causes more broken layouts on Elementor websites than any other factor. In an effort to pass the Lighthouse "Reduce unused CSS" audit, site owners frequently enable aggressive CSS combination (concatenation) and unvalidated automated CSS removal.
Warning: Never Combine CSS Under Modern HTTP/2 & HTTP/3
In the HTTP/1.1 era, combining 30 CSS files into one huge file saved connection round-trips. In modern HTTP/2 and HTTP/3 multiplexed environments, combining CSS is counterproductive: it eliminates browser caching granularity, forces visitors to download one massive 400KB stylesheet before rendering a single pixel, and breaks responsive styling rules when media queries are concatenated out of sequence.
The correct, non-destructive approach to Elementor CSS optimization:
- Generate Asynchronous Critical CSS: Extract the minimal CSS required to paint the above-the-fold viewport and inline it into the HTML document head. Defer the remaining non-critical Elementor stylesheets using asynchronous preloading.
- Minify Stylesheets: Strip whitespace, comments, and line breaks without altering selector ordering or media query specificity.
- Eliminate Global Plugin CSS Enqueues: Use targeted asset unloading (via tools like Perfmatters or custom PHP hooks) to prevent plugins from loading their CSS on pages where their functionality is absent.
8. Optimize JavaScript Without Breaking Elementor Functionality
Elementor relies on JavaScript (`frontend.js`, jQuery, and widget handlers) to power essential interactive components: mobile hamburger menus, accordion toggles, image lightboxes, modal popups, sticky headers, and WooCommerce quantity updates.
When aggressive optimization plugins apply a global "Delay all JavaScript until user interaction" rule, the browser halts all script execution until the user scrolls or clicks. If a visitor taps the mobile navigation menu before scrolling, nothing happens. The menu appears completely dead, resulting in immediate user bounce and lost sales.
Mandatory QA Checklist: Test These After Every JavaScript Change
The Safe Strategy: Defer non-critical scripts (`defer` attribute), but strictly exclude jQuery, Elementor Frontend core, and active form validation scripts from delay lists. Reserve JavaScript delaying exclusively for external marketing trackers: Google Tag Manager, Meta Pixel, Hotjar, and live chat widgets.
9. Optimize Fonts and Icons for Rock-Solid Stability
Web fonts directly govern typography consistency, but they are also a primary catalyst for Cumulative Layout Shift (CLS) and render-blocking latency.
Follow these four typography rules for Elementor:
- Restrict Font Family Variety: Standardize on a maximum of two font families (e.g. one clean sans-serif for headings, one for body copy). Limit active weights to three (Regular 400, Medium 500, Bold 700). Loading six weights across three different families forces the browser to establish multiple TCP font requests totaling over 400KB.
- Host Google Fonts Locally: Avoid calling `fonts.googleapis.com` and `fonts.gstatic.com`. Hosting WOFF2 font files directly on your server or CDN edge avoids external DNS lookups, TLS negotiations, and third-party tracking overhead.
- Apply `font-display: swap`: Configure fonts to swap immediately when loaded, preventing invisible text during font download (FOIT). Pair this with matching fallback font metrics (fallback font override) in CSS to prevent layout shift during the swap.
- Replace Font Awesome with Inline SVGs: Enable "Load Font Awesome 4 Support: No" and activate "Inline Font Icons" under Elementor settings. Instead of fetching the entire 120KB Font Awesome icon font file, Elementor will render only the exact SVG paths used on the page.
10. Reduce Third-Party Scripts: The Invisible Speed Killer
You can optimize every single Elementor container, compress every image into WebP, and host on dedicated NVMe hardware—yet your mobile PageSpeed score will still collapse to 45 if your marketing team injects six heavy third-party scripts via Google Tag Manager.
Third-party scripts (Meta Pixel, Google Analytics 4, TikTok Pixel, Hotjar, HubSpot, and Intercom chat widgets) run massive JavaScript bundles that monopolize the mobile CPU main thread for hundreds of milliseconds.
Mitigation Protocol:
- Consolidate all tracking through server-side GTM or load client-side tags only after the initial page paint completes.
- Load live chat widgets dynamically only when a user clicks a floating "Contact Us" icon, rather than downloading 400KB of chat scripts on initial page render.
- Replace native YouTube and Vimeo video embeds with lightweight lazy-loaded facade placeholders that fetch the iframe only upon user interaction.
11. Optimize Elementor Animations and Motion Effects
Motion design brings personality and polish to an Elementor website, but unrestrained motion effects destroy Core Web Vitals.
When you apply complex Entrance Animations, Parallax scroll effects, or Mouse Track effects to large layout elements, the browser engine must continuously execute repaint and compositing passes across the entire screen. If animated elements lack fixed CSS sizing or animate properties like `top`, `left`, `margin`, or `padding`, they trigger continuous layout reflows, causing severe Cumulative Layout Shift (CLS).
Best Practice: Animate strictly with hardware-accelerated CSS properties: `transform` (translate, scale, rotate) and `opacity`. Never animate layout-defining margins. Disable entrance animations on mobile viewports where screen real estate is limited and mobile processors struggle with frame drops.
12. Improve Elementor Mobile Performance
A common client complaint is: "My Elementor website scores 98 on desktop, but only 48 on mobile! Why?"
Lighthouse desktop audits run with virtually unconstrained CPU bandwidth and broadband speeds. Mobile audits simulate a low-tier processor on a throttled 4G mobile connection. What takes 40ms to compile on a MacBook Pro takes 650ms on a mobile phone.
Mobile Elementor Optimization Checklist
- Set custom responsive background images tailored to 400px–768px widths.
- Avoid loading heavy sliders or multi-column grids above the mobile fold.
- Turn off CPU-intensive entrance animations on mobile viewports.
- Ensure touch targets (buttons, links, form inputs) are at least 48x48px with 8px separation.
- Disable desktop-only decoration widgets using modern container visibility settings.
13. Caching, CDN and Hosting: The Foundation
Frontend optimization cannot compensate for a weak hosting environment. If your server takes 1.4 seconds just to process the initial PHP request and return the first byte of HTML (TTFB), your website cannot achieve a 95+ PageSpeed score.
- Page Caching (Edge & Server-Level): Use high-performance server-level caching (LiteSpeed Cache on LiteSpeed Enterprise, or Nginx FastCGI Cache). Bypasses PHP execution entirely for non-logged-in visitors, delivering sub-150ms TTFB.
- Object Caching (Redis): Essential for WooCommerce stores and dynamic Elementor queries. Stores database query results in memory, eliminating redundant MySQL query execution.
- Global Edge CDN (Cloudflare Enterprise / BunnyCDN): Serves static assets (images, CSS, JS, fonts) from the nearest geographic point-of-presence (PoP) to the visitor, cutting network latency across international audiences.
- PHP 8.2 or 8.3 & OPcache: Modern PHP runtimes execute WordPress code up to 25% faster than legacy PHP 7.4 while consuming significantly less memory.
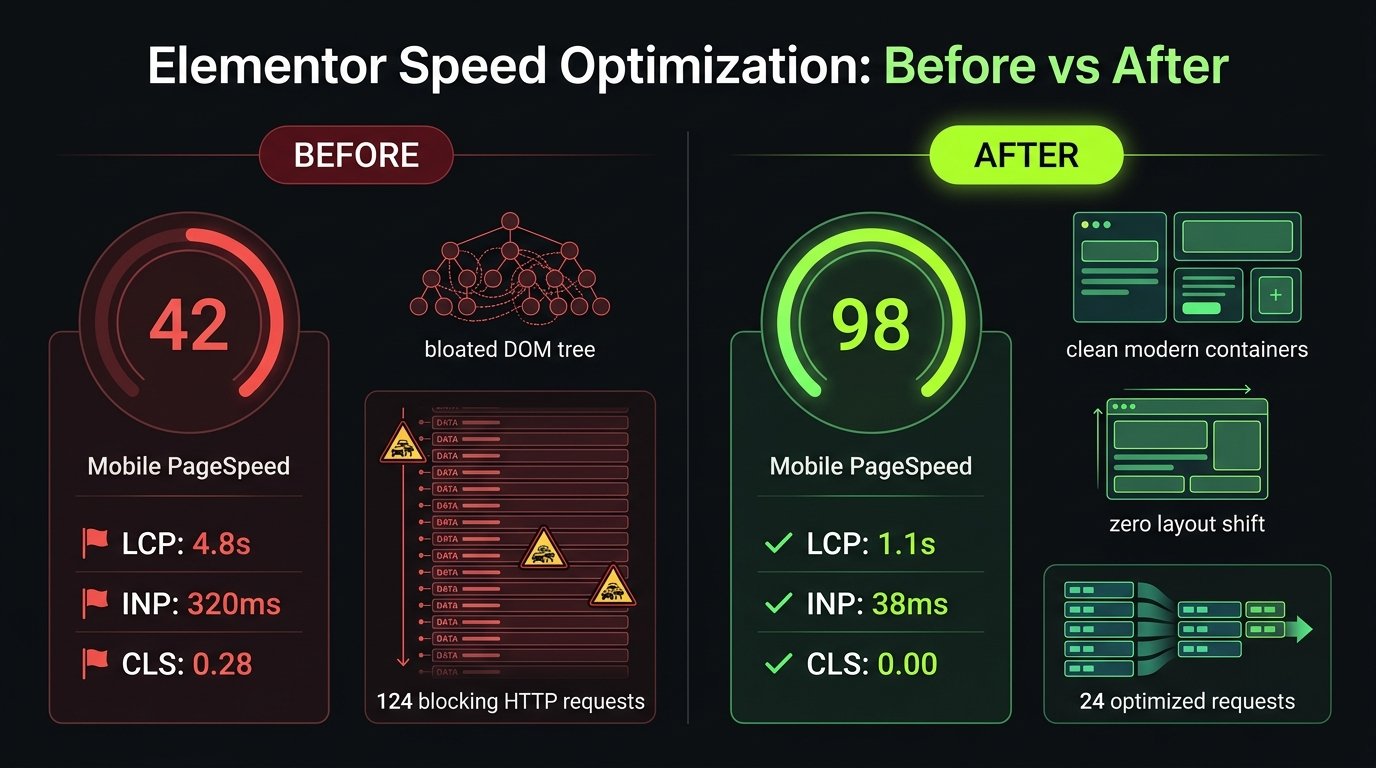
14. How to Optimize Elementor Without Breaking the Layout: The 12-Step Protocol
This is the exact systematic protocol used by senior web performance engineers to optimize complex corporate and e-commerce websites safely:
15. Common Elementor Optimization Mistakes: What NOT to Do
Avoid these 11 critical mistakes that degrade performance or break Elementor layouts:
16. The 95+ PageSpeed Elementor Optimization Checklist
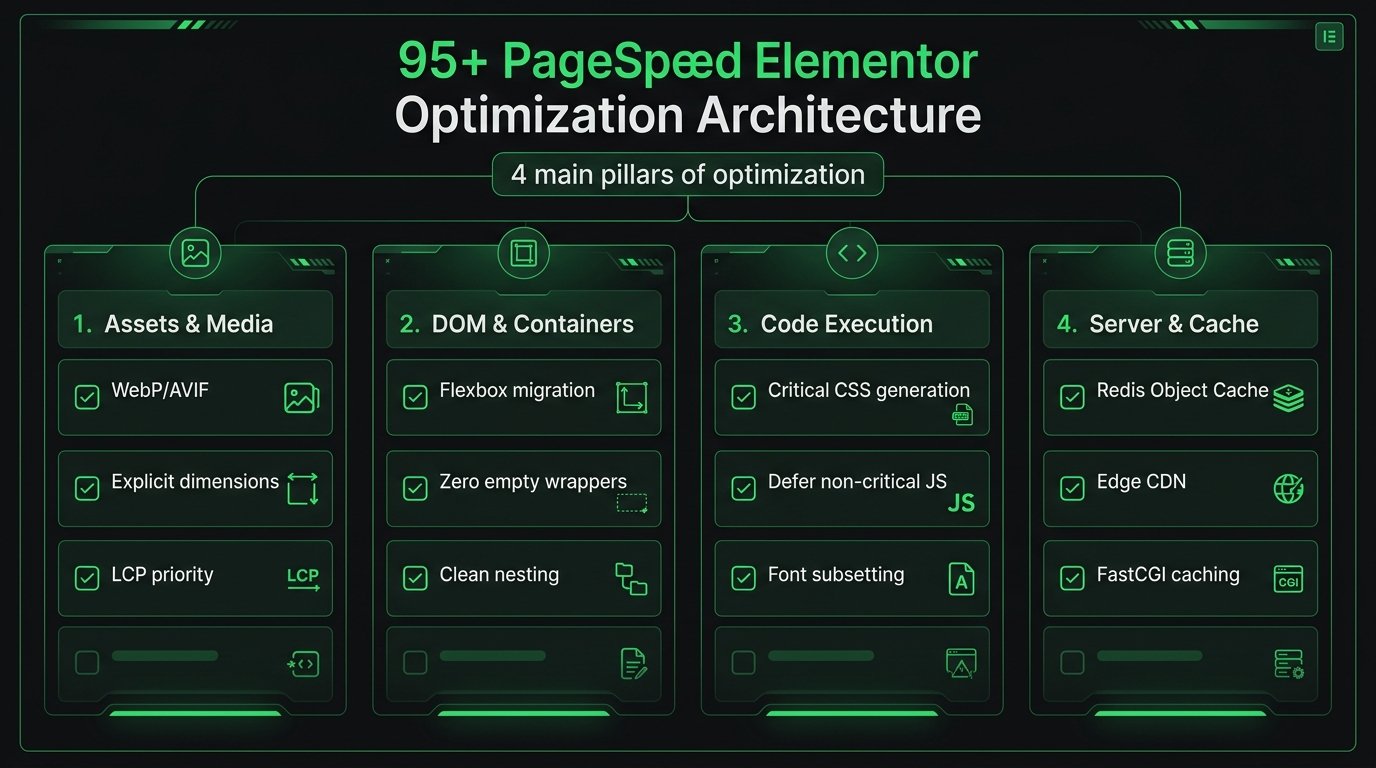
Interactive Developer Checklist
24 Action Items"Don't chase 95+. Chase a faster, rock-solid, usable website that converts visitors into customers."
17. When Should You Hire an Elementor Speed Optimization Expert?
While following this guide empowers you to resolve standard caching, media weight, and container bottlenecks, certain complex architectural challenges require senior-level engineering diagnosis:
- Layout Breakages After Optimization: CSS conflicts, broken flex alignments, missing icons, or responsive distortions that occur when optimization plugins are engaged.
- Persistent JavaScript Console Errors: Uncaught TypeErrors breaking interactive mobile navigation drawers, modal popups, or multi-step checkout forms.
- Complex Elementor + WooCommerce Deployments: Slow AJAX checkout review updates, delayed cart refreshes, or excessive database transients on stores with thousands of SKUs (see my related WooCommerce Slow Checkout Troubleshooting Guide).
- Severe Database Bloat & Server Lockups: 100% CPU spikes caused by unindexed options queries or broken WP-Cron transients (see my Database Bloat Resolution Case Study).
- Agency Overflow & Mission-Critical Client Portals: When agency deadlines require guaranteed Core Web Vitals compliance without risking client visual regressions.
18. Need Help Speeding Up Your Elementor Website?
Achieve Sub-Second Load Times on Your Elementor Website
I provide direct, root-cause Elementor performance engineering. No automated plugin stacking, no broken responsive menus, and no design compromises. Every audit is conducted with low-level profiling tools to guarantee passing Core Web Vitals.
19. Frequently Asked Questions

Saiful Asif
Elementor Performance SpecialistSenior Full-Stack WordPress & WooCommerce Developer with 7+ years of hands-on engineering experience. Specializes in low-level speed profiling, Core Web Vitals remediation, custom ACF block themes, and high-concurrency database architecture for enterprise brands and agency partners worldwide.
Related Performance & Engineering Guides
WooCommerce Slow Checkout Troubleshooting: Causes, Fixes & Performance Guide
Trace slow AJAX wc-ajax=update_order_review requests, carrier shipping APIs, and payment gateway timeouts.
Incident Case StudyResolving Runaway Database Session Bloat & 100% CPU Lockups
How orphaned WooCommerce sessions and unindexed wp_options queries crashed server resources.